A 5-pin XLR connector is a locking circular connector with five contacts, used mainly for DMX512 stage lighting and dual-channel (stereo) balanced audio. For DMX: Pin 1 = Ground, Pin 2 = Data 1−, Pin 3 = Data 1+, Pins 4/5 = optional second data pair. Note: audio and DMX reverse the Pin 2/Pin 3 assignment.
Wiring a DMX lighting rig and unsure why the standard calls for 5 pins instead of 3? Building a stereo microphone or intercom cable? Whether you work in stage lighting or professional audio, the 5-pin XLR is the connector that carries two signal pairs through one rugged, locking shell. Because it handles DMX512 lighting data, dual-channel audio, and stereo intercom alike, understanding its two different pinouts is the key to clean, reliable signals. This guide covers the pinouts, real-world uses, the 3-pin comparison, and step-by-step wiring.
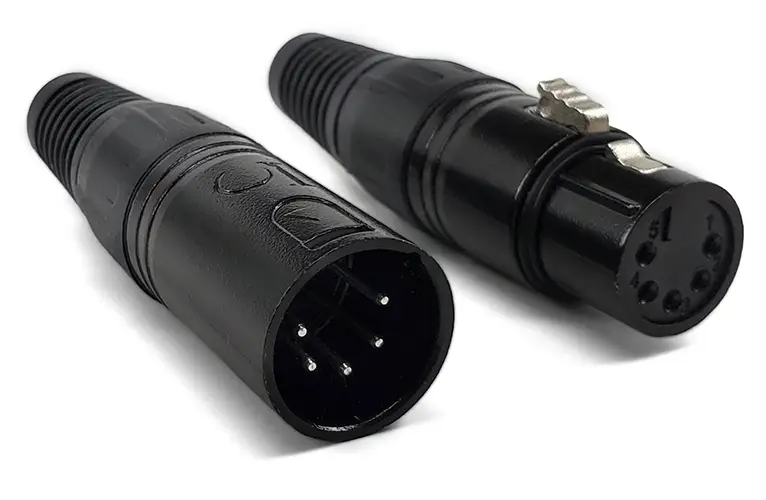
What is a 5 Pin XLR connector?
The 5-pin XLR connector is a circular, locking audio/data connector with five independent contacts in a metal or plastic housing. Although the 3-pin version is the most common XLR type for microphone and line-level signals, the 5-pin version is built for more complex needs — two balanced audio channels at once, or DMX512 stage-lighting control data.
Because the XLR family is built around balanced, differential signaling — hot, cold, and ground working together — the XLR connector actively cancels electromagnetic interference and noise. For the full pin-by-pin reference across all XLR variants, see our XLR connector pinout guide.
Fast definition
The 5 pin XLR connector integrates five independent conductors in a single locking connector housing, which can simultaneously carry dual-channel audio, DMX data or dedicated internal call signals in a single cable.
5 Pin XLR Connector vs. 3 Pin XLR: Core Difference
The 5-pin XLR differs from the 3-pin in one decisive way: it carries two signal pairs, not one — enabling stereo audio or a full DMX data link in the same locking shell.
| Feature | 3 Pin XLR | 5 Pin XLR Connector |
|---|---|---|
| Pin Count | 3 | 5 |
| Primary Use | Mono balanced audio | Dual-channel audio, DMX, intercom |
| Common Application | Microphones, DI boxes | Stereo mics, stage lighting, headsets |
| Signal Channels | 1 balanced channel | 2 balanced channels |
| DMX Compatibility | Adapted use (not standard) | Standard 5-pin DMX512 connector |
| Connector Size | Same barrel diameter | Same barrel diameter |
| Locking Mechanism | Yes | Yes |
Bottom line: Because both connectors share the same rugged locking shell, the 5-pin adds scalability without enlarging the cable. While the 3-pin carries one balanced channel, the 5-pin carries two — making it the choice for stereo audio and DMX.
💡 How does it compare to the 4-pin? A 4-pin XLR intercom headset is mono (both earpieces get the same audio), while a 5-pin headset is stereo (separate left/right). For that comparison, see our 4-pin XLR connector guide and the full 3-pin XLR connector guide.

5 Pin XLR Pinout: Audio vs DMX Wiring
A 5-pin XLR has two different pinouts depending on use — audio assigns Pin 2 = hot/+, while DMX assigns Pin 2 = Data 1−, so the two are electrically opposite and never interchangeable.
Standard 5-Pin XLR Audio Pinout
It is suitable for dual-channel balanced audio, which is the most common professional audio application:
| Pin | Assignment | Notes |
|---|---|---|
| Pin 1 | Ground / Shield | Common ground for both channels |
| Pin 2 | Channel 1 — Hot (+) | Positive signal, channel 1 |
| Pin 3 | Channel 1 — Cold (−) | Negative/return signal, channel 1 |
| Pin 4 | Channel 2 — Hot (+) | Positive signal, channel 2 |
| Pin 5 | Channel 2 — Cold (−) | Negative/return signal, channel 2 |
DMX512 5-Pin XLR Pinout
When used as a DMX lighting connector, the pin definition follows the ANSI E1.11 DMX512-A standard:
| Pin | Assignment | Notes |
|---|---|---|
| Pin 1 | Ground / Shield | Cable shield |
| Pin 2 | Data 1 — Negative (−) | Primary DMX data, cold |
| Pin 3 | Data 1 — Positive (+) | Primary DMX data, hot |
| Pin 4 | Data 2 — Negative (−) | Secondary data (optional) |
| Pin 5 | Data 2 — Positive (+) | Secondary data (optional) |
⚠️ Critical: Because the audio and DMX standards assign Pin 2 and Pin 3 in opposite polarity, an audio cable and a DMX cable are not interchangeable even though both are 5-pin. If you connect an audio device to a DMX link (or vice versa), you won’t damage hardware — but the signal will fail. To avoid confusion on a busy stage, always label each cable by use (audio or DMX).
DMX512 Daisy-Chain, Termination & Device Limits
Because DMX512 is a daisy-chain network based on RS-485, each fixture has a DMX In and a DMX Thru/Out. When you reach the last fixture in the chain, fit a DMX terminator — a 120-ohm resistor across Pin 2 and Pin 3 — to prevent signal reflections (many modern fixtures auto-terminate). Per the ESTA DMX512-A standard, a single DMX run should stay under about 300 m (1,000 ft) and drive no more than 32 devices per chain. If you need more, use a DMX splitter/booster to start a fresh chain.
Why 5-Pin Matters: RDM and the Second Data Pair
Although Pins 4 and 5 are often left unused in basic DMX, they enable a major capability: RDM (Remote Device Management). Because RDM’s return channel requires the auxiliary differential pair on Pins 4/5, true 5-pin wiring lets a controller remotely query, configure, and monitor fixtures — remote address setting, sensor feedback, and fault reporting. If you use a 3-pin DMX cable (or a 5-pin cable with Pins 4/5 unwired), only one-way control is possible. This is the core reason professional and theatrical rigs stay with full 5-pin.
7 common application scenarios of 5 Pin XLR connector
The 5-pin XLR serves seven core roles, but two dominate: DMX512 lighting control and stereo/dual-channel audio — the rest are specialty power and intercom uses.
Dual-Channel Microphone System
Stereo or dual-diaphragm microphones – such as Mid-Side (M/S) stereo microphones and dual-diaphragm overhead microphones – rely on 5-pin XLR to transmit two channel signals through a single cable. This makes the stage wiring cleaner and reduces the number of traces from the microphone to the preamp.
DMX512 Stage Lighting Control
5-pin XLR is the official DMX512 connector in the ESTA standard. It connects a lighting controller, dimmer, moving head, LED PAR lamp, and other luminaires in a daisy chain. Professional lighting systems almost always give priority to the use of the 5-pin. Once a rig outgrows a single 512-channel DMX line, the next decision is the control transport itself — our DMX vs Art-Net vs sACN comparison covers when to move onto a networked protocol.
Professional Intercom & Headset Systems
The broadcast- and theater-grade intercom systems from brands like Clear-Com and RTS use 5-pin XLR for full-duplex party-line headset connections. Because the extra pins carry separate send and receive audio plus beltpack power, a single cable handles everything.
Stereo In Ear Monitor/IEM system
Part of the in-ear listening (IEM) transmitter and receiver uses a 5-pin XLR connector at the beltpack, which is used to transmit the stereo mixing signal-left and right channels to the stage performer.
Powered/Phantom Microphone Cables
Some special studio microphones, especially retro style tube condenser microphones, require an independent power supply to transmit DC voltage and audio signals simultaneously through a single cable, usually using a 5-pin or 7-pin XLR configuration to separate the power path from the audio path.
Ribbon Microphone Connections
Some high-end ribbon microphone manufacturers use 5-pin XLR when the mic has an active buffer or needs a dedicated power line separate from phantom power.
Custom AV & Broadcast Installations
Systems integrators and broadcast engineers often use 5-pin XLR connectors to process customized routing requirements that require multiple signals to be transmitted through a single solid connector in fixed installation projects such as rebroadcast vehicles, chapels, and large venues.
How to Solder a 5 Pin XLR Connector: Step-by-Step
As long as the correct pinout definition is followed and the appropriate tool is used, the self-made 5 pin XLR connector cable is not complicated. The following is the specific steps of making a dual-channel balanced audio cable:
Tools and materials required
- 5-pin XLR male and female connector
- Dual-channel balanced cables
- soldering iron + rosin-core solder
- Wire stripper and heat-shrink tubing
- Multimeter, used for continuity testing
Soldering Steps
- Strip the outer jacket – strip the outer insulation skin of about 40mm, and expose the inner conductor and shield.
- Separate the conductors – identify the ground wire, Ch1 hot end, Ch1 cold end, Ch2 hot end and Ch2 cold end, and twist the shielding layer into a single strand.
- Tin each wire – a small amount of solder is soldered at the end of each stripped conductor to prevent loose wires and improve the quality of solder joints.
- Thread the cable – Before soldering, the cable is first passed through the connector rear shell and the strain relief device.
- Solder to pins – solder each conductor to the corresponding pins according to the pinout table above. Start from Pin 1 (ground wire) to operate outwards, keep the solder joints clean, and avoid bridging.
- Assemble the housing – after the solder joint is cooled, the barrel housing is mounted on the connector body and the strain relief device is tightened.
- On-off test (Test continuity) – uses a multimeter to check the connectivity of each pin at both ends of the cable one by one, and can be used after confirming that it is correct.
For the complete soldering technique — iron temperature, cold-joint identification, and troubleshooting — see our dedicated solder XLR connector guide.
Pro tip
The locking chuck strain relief design can significantly reduce the probability of cable fracture at the connector inlet, which is the first major cause of cable failure in field use.

How to Choose a 5 Pin XLR Connector
Choosing a 5-pin XLR starts with one question — audio or DMX? — because the two use opposite Pin 2/3 wiring; then weigh build quality, shell material, and contact plating.
- Application — audio or DMX? Because the two use opposite Pin 2/3 wiring, confirm the correct pinout before buying.
- Build quality — Because unbranded connectors introduce contact resistance and failures over time, choose reputable brands. Neutrik, REAN, and Amphenol are established names; for high-quality OEM and custom 5-pin assemblies, Verchil manufactures connectors and cables built to your audio or DMX spec.
- Shell material — Because touring is hard on connectors, metal shells (nickel or chrome) outlast plastic.
- Cable compatibility — match the connector to your cable’s outer diameter so the strain relief grips properly.
- Contact plating — gold-plated pins resist oxidation in humid environments.
- Color coding — Because labeling prevents audio/DMX mix-ups on a busy stage, many 5-pin connectors offer colored boots to distinguish cable types at a glance.
Frequently Asked Questions
Can 5 pin XLR connectors be used with 3-pin devices?
Can not be used directly. You need an adapter or a custom wiring solution. Do not force the 5-pin plug into the 3-pin socket-the two pins are arranged differently. However, there is a dedicated adapter line (5-pin to dual 3-pin breakout adapter) available on the market, which is widely used in stereo microphone systems.
Is 5-pin XLR the only DMX connector?
This is not true – 3-pin XLR connectors are widely used in DMX512 systems due to their low cost and easy availability, but the ESTA/ANSI standard explicitly specifies 5 pin XLR connectors as regular DMX connectors. The 3-pin version belongs to the industry adaptation scheme, and there is a risk that the audio device signal is mistakenly connected to the light data link.
What kind of cable should be used with 5 pin XLR connector?
For audio applications, please use a dual-channel balanced cable, such as Mogami W2932 or Canare L-4E5C. DMX applications use dedicated 110 ohm DMX cables (rather than ordinary audio cables) to ensure signal integrity during long-distance transmission.
How far can the 5 pin XLR DMX signal be transmitted?
The DMX512 standard supports a transmission distance of up to about 300 meters (about 1,000 feet) using the correct 110-ohm DMX cable with a terminator resistor at the end of the link. Beyond this distance, you need to use a DMX splitter or signal booster.
Is 5 pin XLR connector waterproof?
The standard 5-pin XLR connector is not waterproof. For outdoor or touring scenarios, use an IP65 certified connector with rubber seals or put a protective cap on it when not in use.
What is the difference between a 4-pin and 5-pin XLR connector?
A 4-pin XLR is mainly used for mono intercom headsets, while a 5-pin XLR carries stereo audio or DMX512 lighting data. Because the 5-pin adds a fifth conductor, it supports a second channel (stereo left/right) or a second DMX data pair. If your intercom headset needs separate left/right audio, choose 5-pin. See our 4-pin XLR connector guide for the mono comparison.
Is 5-pin XLR the same as a 5-pin DIN connector?
No — they look similar but are not interchangeable. Because the 5-pin XLR uses a larger locking barrel and different pin geometry, it won’t mate with a 5-pin DIN (used for MIDI and some legacy audio). Before buying an adapter, confirm you need XLR, not DIN — the two are easily confused but electrically and physically distinct.
Summary: Is the 5-Pin XLR Right for Your System?
The 5-pin XLR connector is an indispensable tool for any serious audio or lighting professional. Because it carries two balanced audio channels or DMX512 control data in the same proven, locking XLR form factor, it’s one of the most efficient connectors in the industry.
Whether you’re building stereo microphone cables, designing DMX lighting links, or wiring intercom systems, a solid grasp of the 5-pin pinout, connector selection, and wiring technique helps you build noise-free systems that run reliably night after night. Because audio and DMX use opposite Pin 2/3 wiring, always label cables by purpose and test each one before taking the stage. On a touring rig, that XLR link is just one layer of the connectors used across a stage lighting rig — power locks, DMX or network control, and weatherproofing all have to hold together.
Companion guides: XLR connector pinout, 3-pin and 4-pin XLR connector guides, and the solder XLR connector guide. For custom 5-pin XLR or DMX assemblies, contact our technical team.
